SKETCHBOOK ASSIGNMENTS WEEKS 1 AND 2: All sketchbook assignments will be due before the in class assignments are finished. They are a way for you to rehearse (so to speak) for the big event. Please date each page and give an approximate time it took for you to complete the drawing.
WEEK 1: INTRODUCTION
Complete several drawings in any media of your face and hands in any style using line, this will be our baseline.
WEEK 2: LINE
Complete at least 5 line drawings of a single object, something that grabs your attention like a shoe or hand or foot or plant or even your face.
1. gesture — quick drawing that captures form and proportions with out focusing on detail
2. contour — much slower pace where you work in one continuous line describing the edges of the form
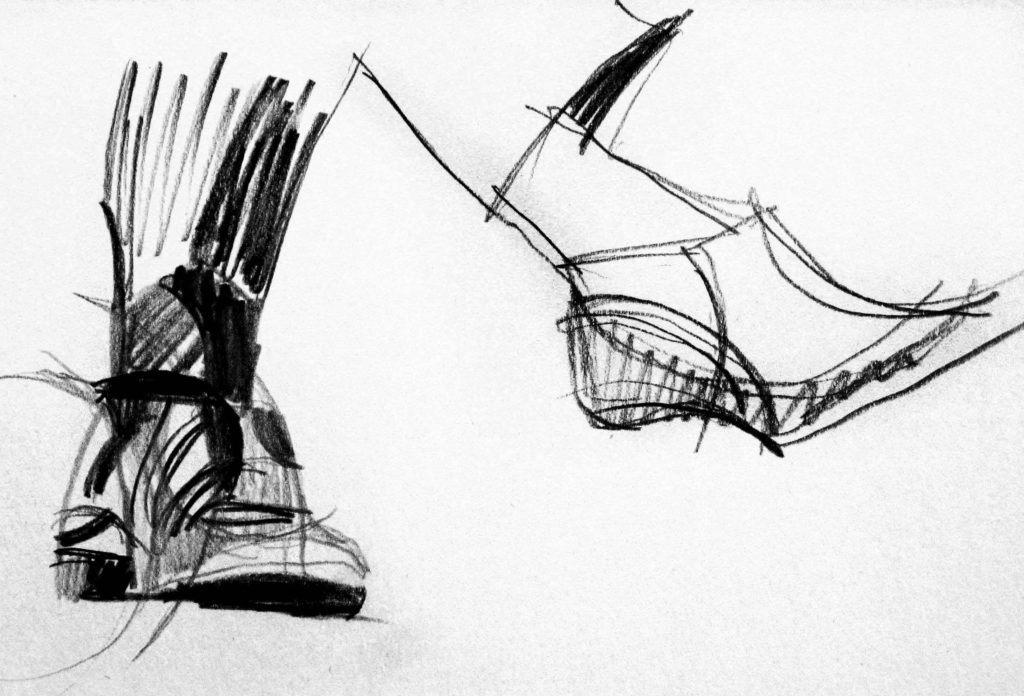
3. searching line— a repeating line where you go over and over the shape of the form until you get the exact location
4. scribble line — just that, loose and gestural a scribble drawing that does pay attention to detail as well as form
5. organizational line — the basis for the formal organization of the shapes in your object, starting with a diagram, plotting out the top bottom and sides with straight lines, the organizational lines extend beyond the object as a scaffolding
gestural line 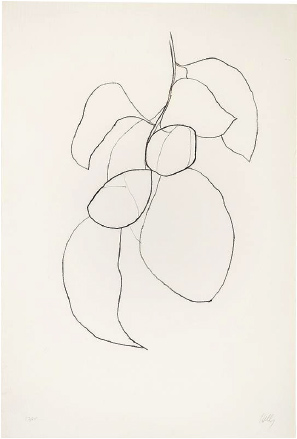
contour line (Ellsworth Kelly) 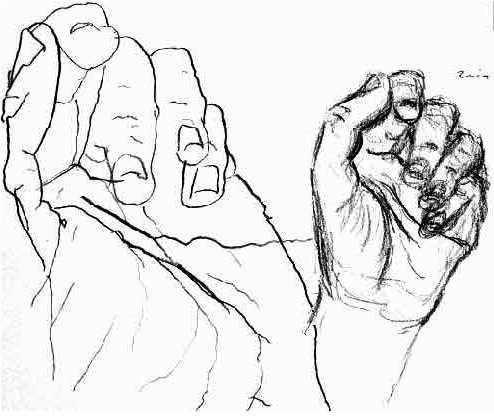
blind contour line and searching line 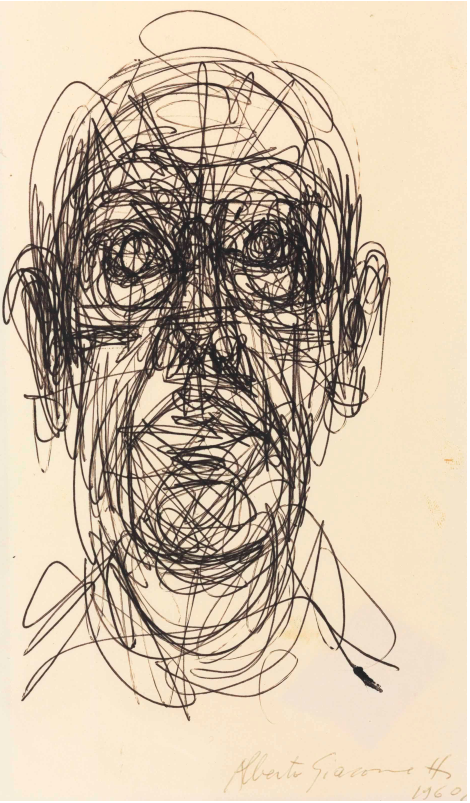
scribble line (Alberto Giacometti) 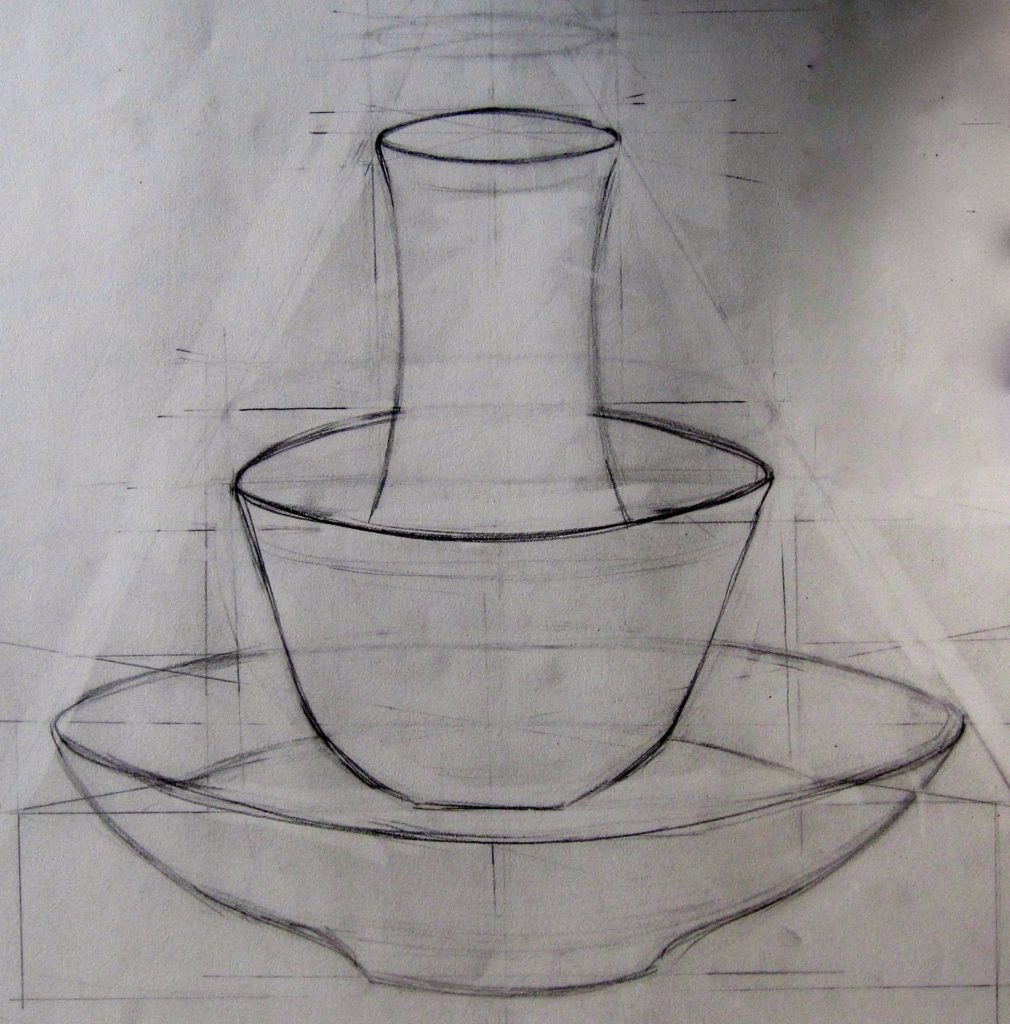
organizational line
WEEK 3: LINE CONTINUED
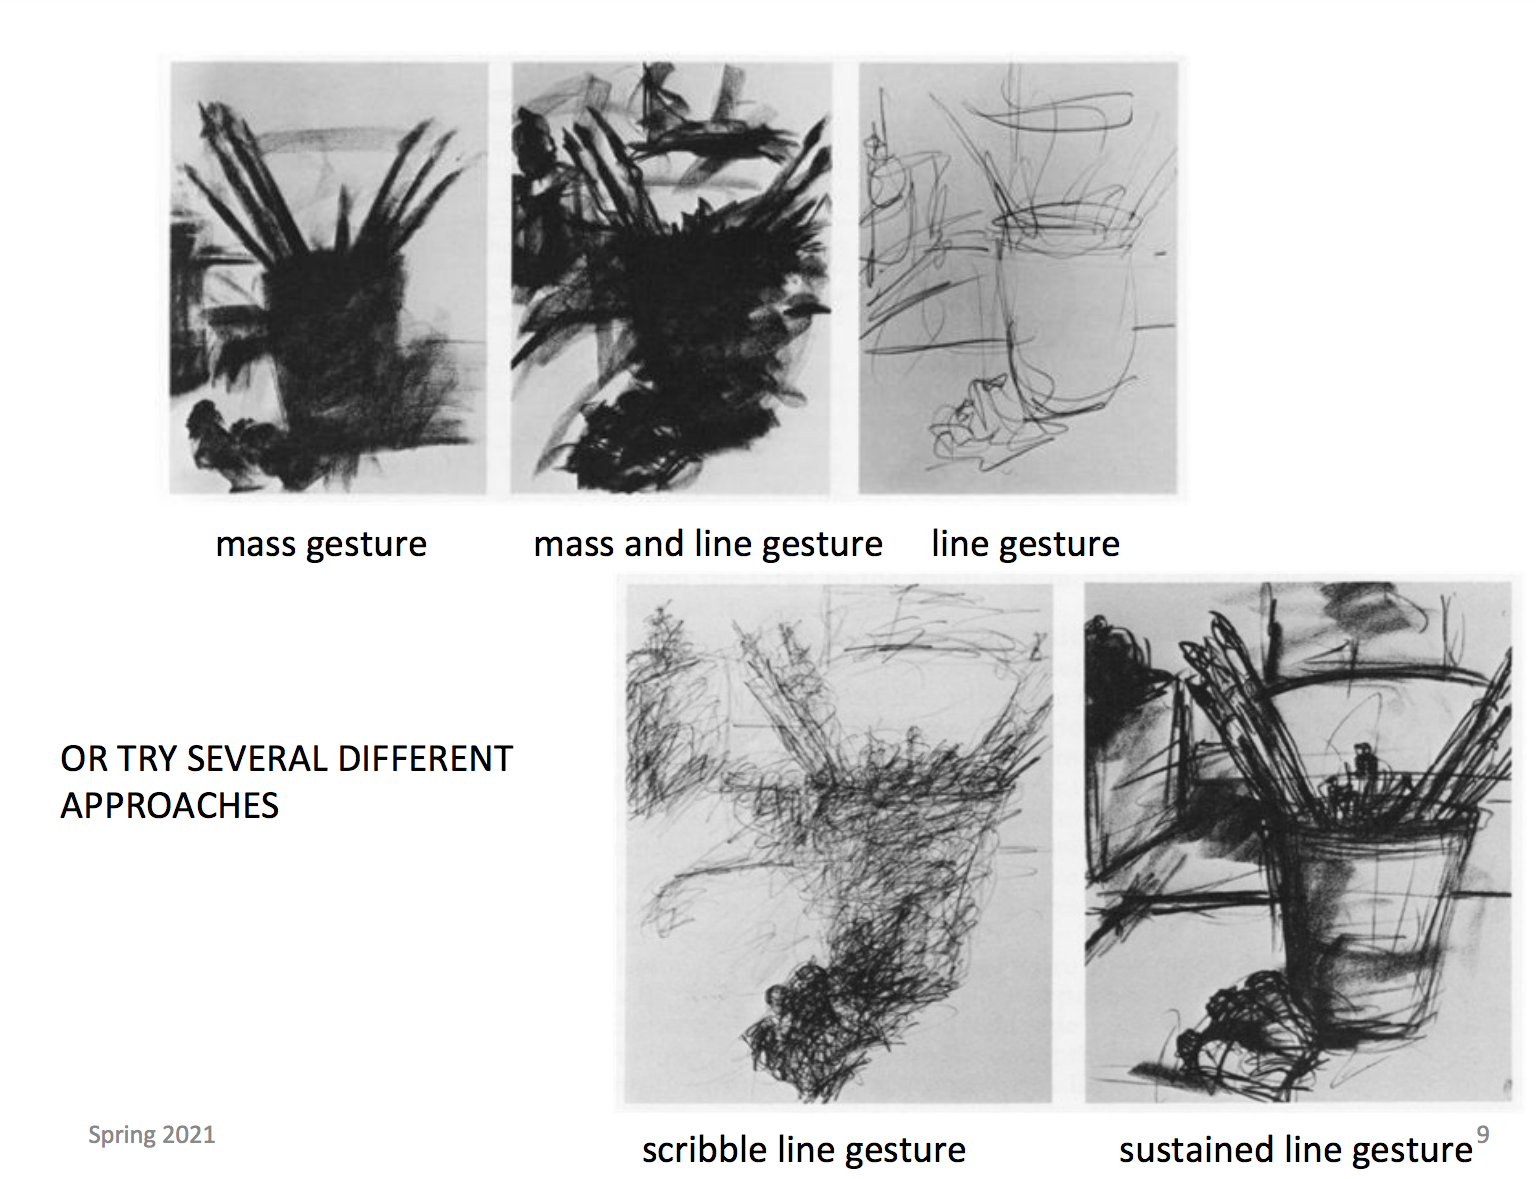
SUSTAINED GESTURE AND ORGANIZATIONAL LINE DRAWINGS OF A COMPLEX STUDIO SETUP. 5 drawings, 5 different approaches.
WEEK 4: VALUE STUDIES
Several simple value studies in various media: charcoal, graphite, pen, ink wash of drapery, a small box, and an egg or a small ball.
drapery in Conté crayon 
drapery in vine charcoal 
drapery in graphite 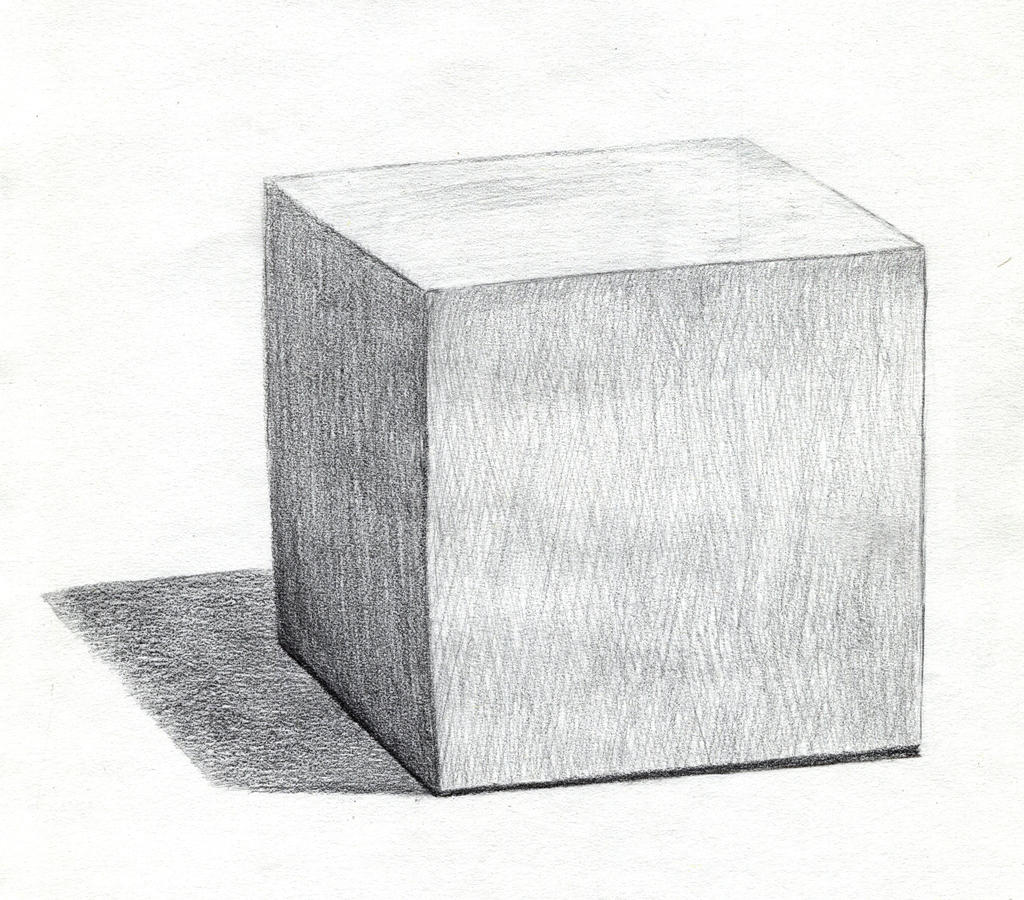
box in graphite 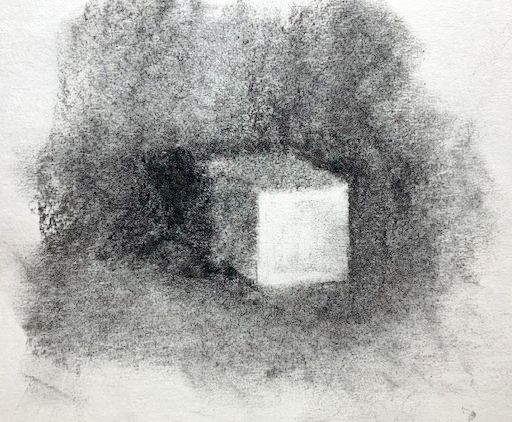
box in charcoal 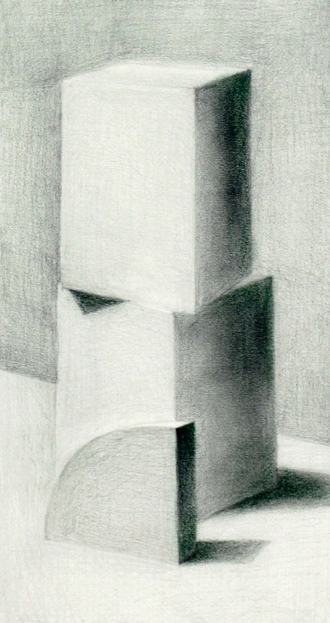
boxes in conté crayon 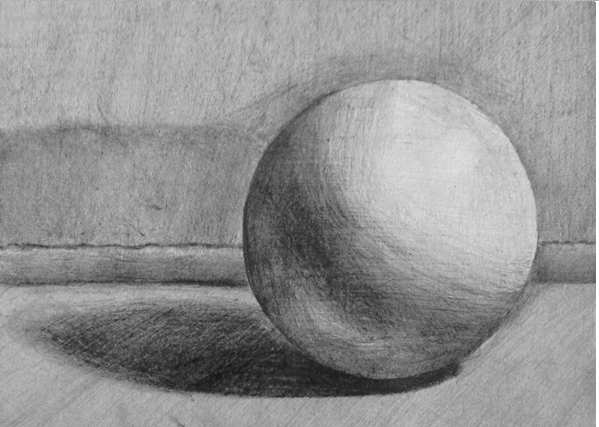
sphere in charcoal 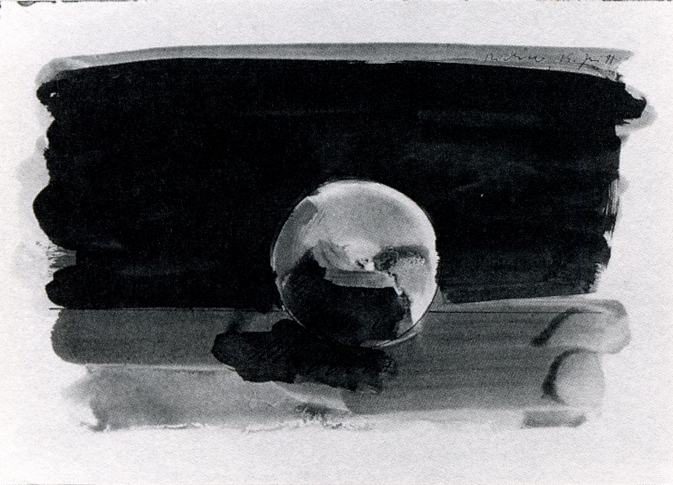
sphere in ink wash 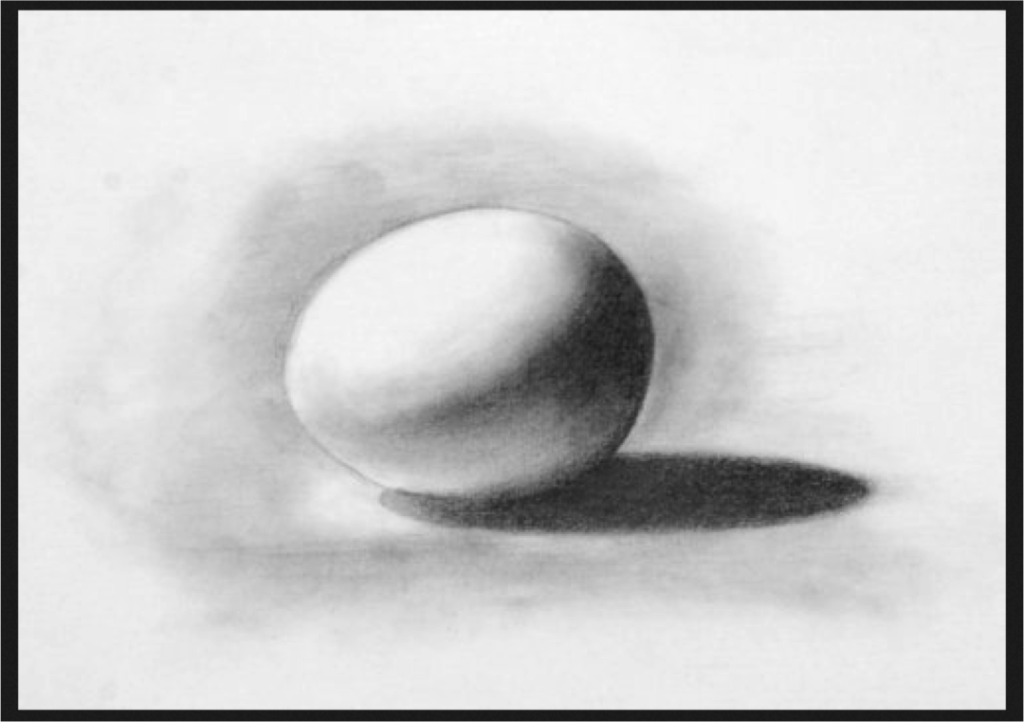
egg in charcoal
WEEK 5 SKETCHES:
3 value sketches using different materials: one high key using all the values from middle grey to white. One Low key: using all the values from middle grey to black and one high contrast using white and light and dark and black but no middle grey.
high key drawing 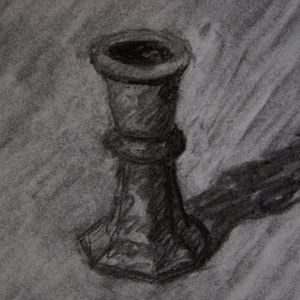
low key drawing 
high contrast drawing

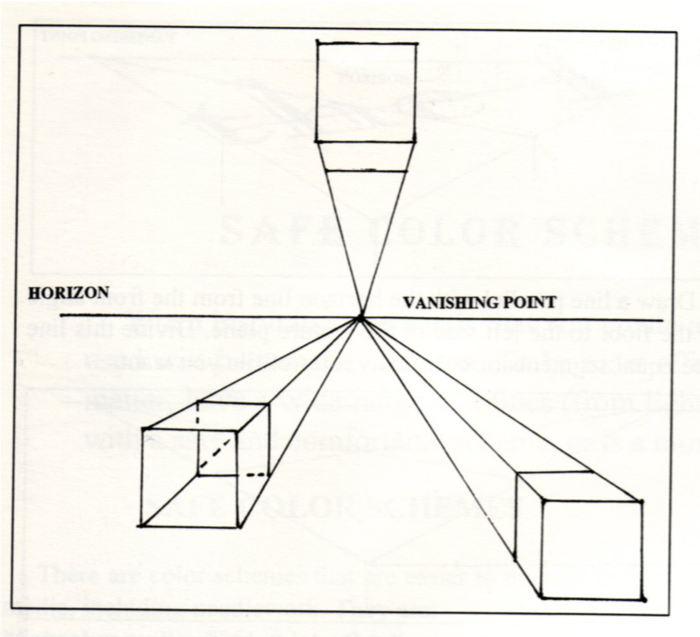
WEEK 6: PERSPECTIVE STUDIES
This week practice perspective in your sketchbook, both one and two point perspective with the vanishing points located on your page: see examples below.
Draw boxes on the horizon (eye-level) line
above the horizon line (where we can see the bottom of the box)
below the horizon line (where we can see the top of the box)
you may cut rectangular openings in the boxes, draw as many boxes as you wish, but keep the vanishing points on the page. You may refer to this video on 2-Point perspective for an explanation. https://www.youtube.com/watch?v=lu-vtZ7nveg&list=PLAC3OHG9cGta9zYO36lruaKIQLTCOJWQ1
one point perspective 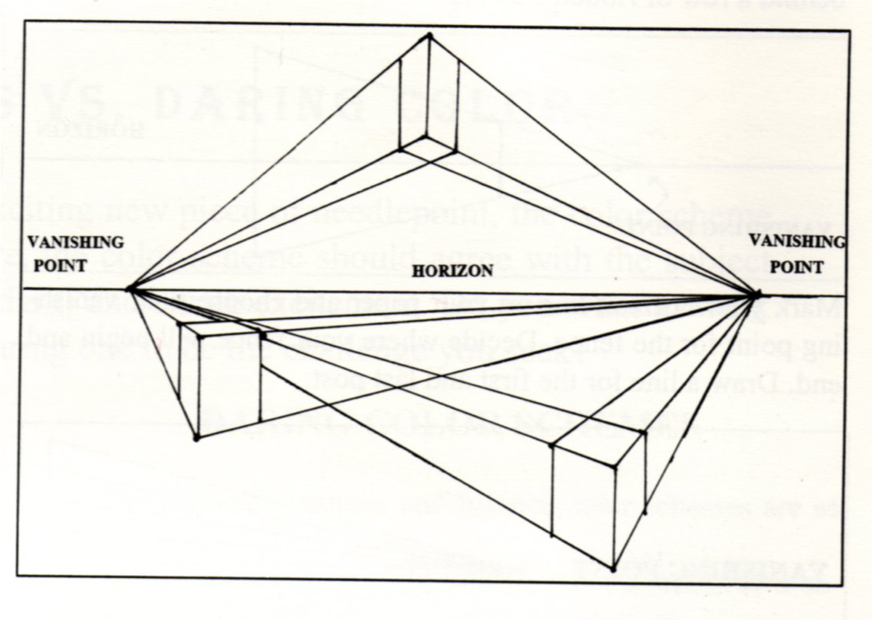
two point perspective
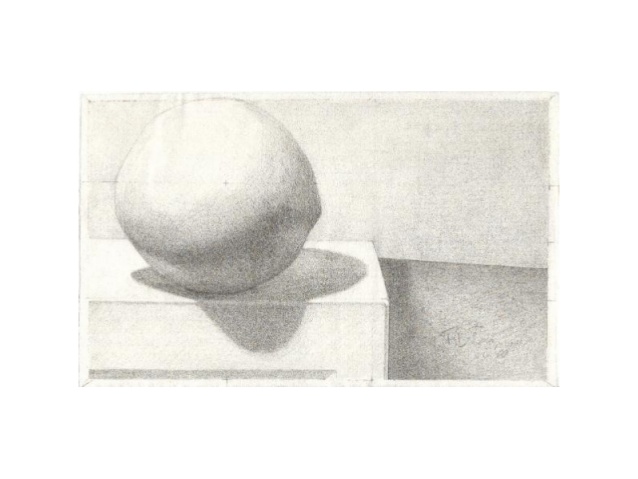
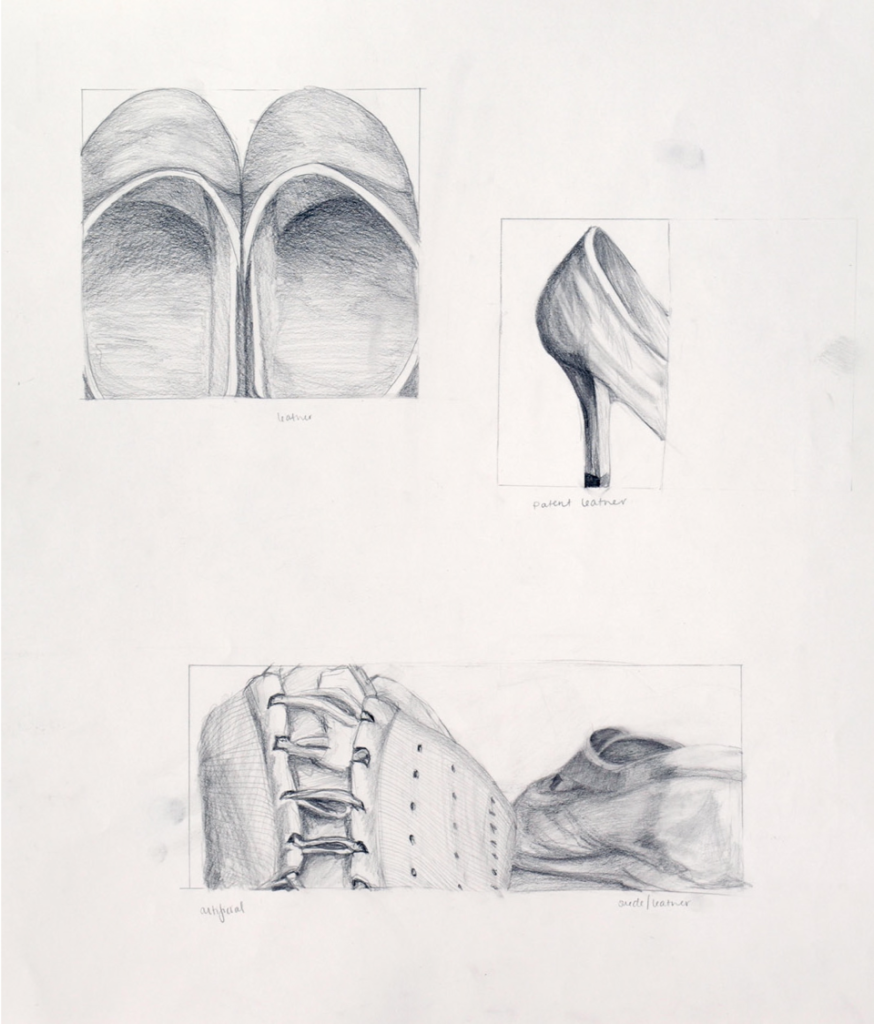
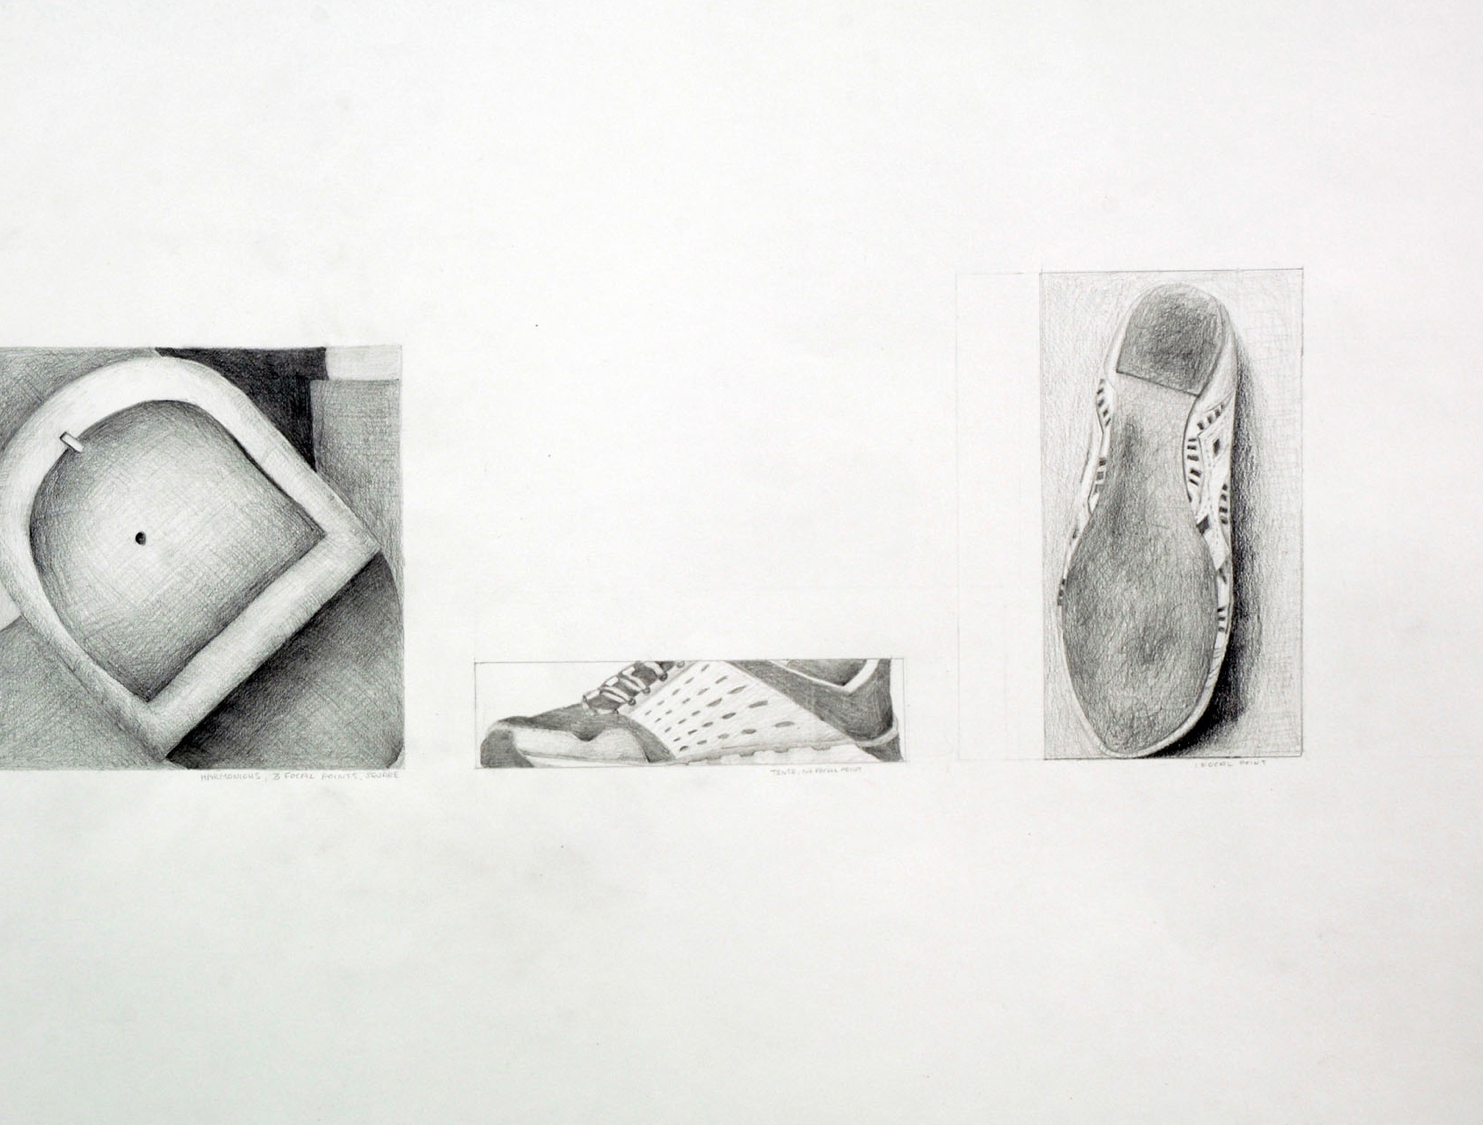
MARCH 30 – APRIL 1: COMPOSITION
This week work on drawing objects within a particular format. You may fit the format to the object or crop in so that you have an interesting view. Pay attention to the balance between object and ground. See if a cast shadow will help you compose the space or seems superfluous. Use at least 3 different formats: square, horizontal and vertical as represented in the examples below.
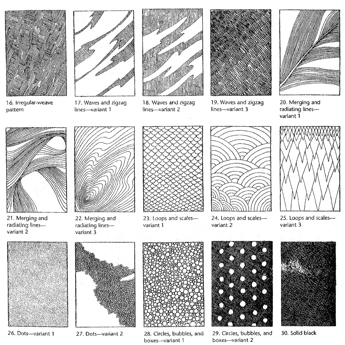
SKETCHBOOK ACTIVITIES APRIL 6- 15: TEXTURE, LANDSCAPE and NATURAL FORMS using a variety of approaches and materials.
In your sketchbook with one drawing per page, do 5-6 texture studies.
- with simulated texture of a smooth object,
- one with simulated texture of a rough object
- 1 foliage study
- 1 cloud study
- 1 study of a small piece of earth
- 1 small texture study of a natural object of your choice
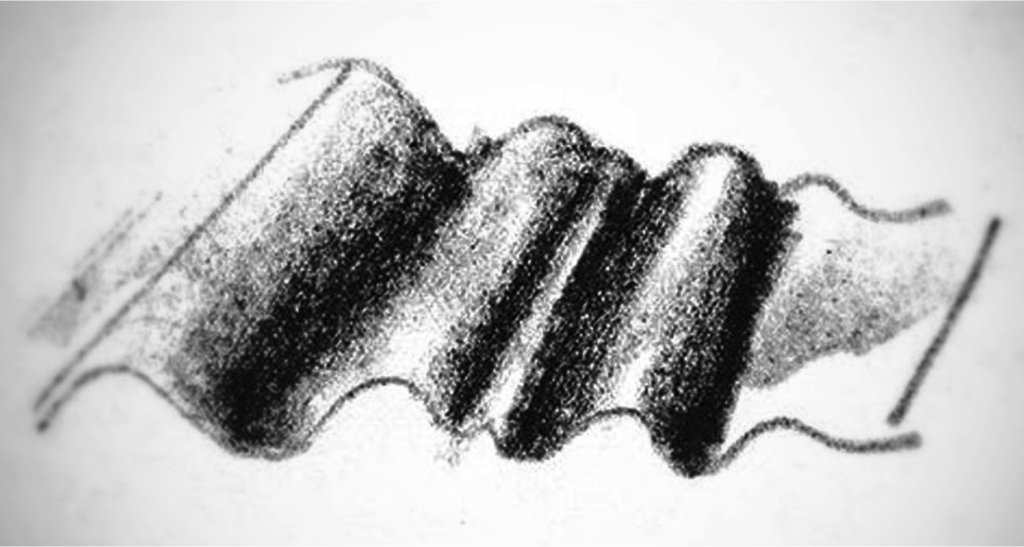
In addition complete 9 invented texture studies as illustrated below using pen or graphite or thin marker:
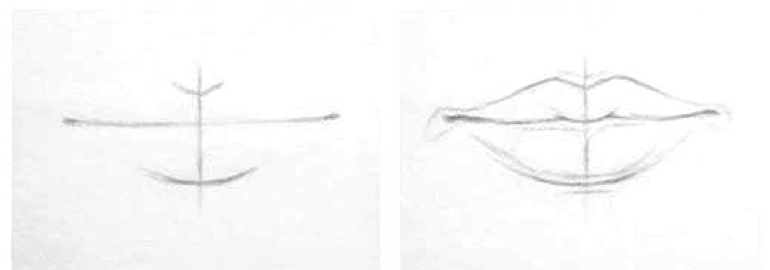
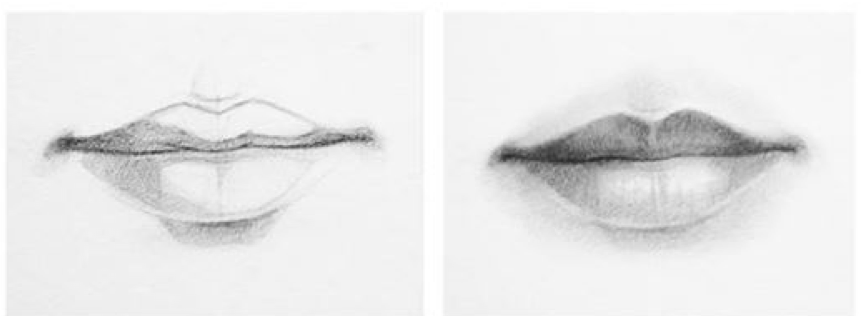
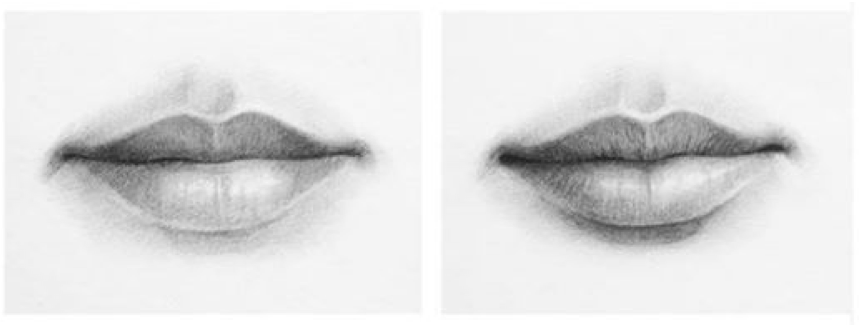
SKETCHBOOK ACTIVITIES APRIL 20-27: PORTRAITS
- Make a DETAILED drawing of your mouth and the area around it. Include everything you see when observing closely in clear, even lighting. Start in line, then gradually add tone
- Ask friends to pose or make drawings during Zoom Classes, and do simple drawings of their nose from the side, from the front and from an angle. Spend about 10 minutes per person and draw as many friends’ noses as you can, filling the sketchbook page with nose studies. Look for unusual noses and line up the studies to compare proportions.
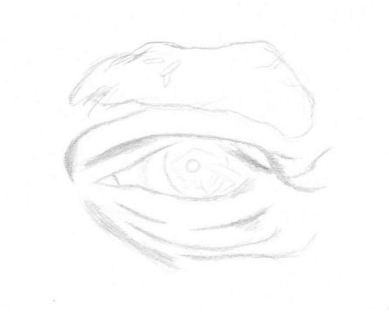
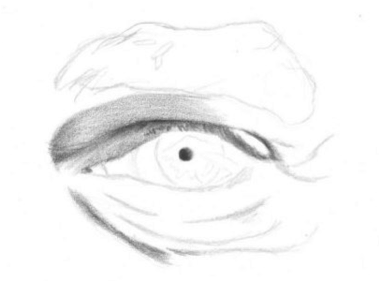
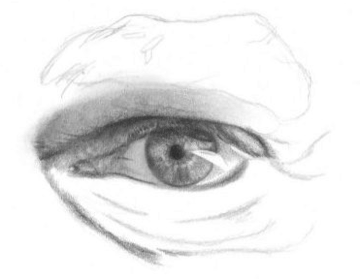
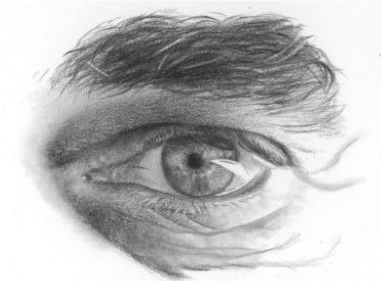
3. Make a DETAILED drawing of your eye and the area around it. Include everything you see when observing closely in clear, even lighting. Start with a line drawing, gradually add tone. Render the iris with careful attention to the highlight in the eye. Keeping the highlighted area clean is crucial to attaining a reflective look. It should be the lightest part of the entire drawing. Shade around this area. If you want the highlight more brilliant, lay down more tone around it.